Capturing the fluid beauty of water with its ever-changing colors and reflections can be a delightful challenge. Whether it’s a serene lake reflecting the sky or a crashing wave catching the light, drawing colored water requires a keen eye for detail and a good understanding of color mixing.
 Colored pencils and water painting
Understanding Water and Color
Before you begin, it’s essential to observe how water interacts with light and reflects its surroundings. Notice how the colors of the sky, nearby objects, and the water itself blend, creating a spectrum of hues. Remember that water is transparent, meaning the colors you see are often a result of what lies beneath or reflects on its surface.
Essential Materials for Drawing Colored Water
Having the right tools can significantly impact your artwork. Here’s a list of materials that work well for drawing colored water:
- Watercolor pencils: These versatile pencils offer both precision and the ability to be blended with water, creating soft, flowing effects perfect for depicting water.
- Watercolor paints: Provide a wider range of colors and allow for greater control over blending and creating gradients.
- Watercolor paper: This paper is designed to handle the wetness of watercolors without buckling.
- Brushes: Choose brushes of various sizes for different details and effects. Round brushes are great for blending, while flat brushes can create bold strokes.
- Masking tape: Use masking tape to secure your paper and create clean edges.
- Salt: Sprinkling salt on wet watercolor creates unique textures that resemble foam or ripples.
- Paper towels: Essential for blotting excess water and creating interesting effects.
Techniques for Drawing Colored Water
Now, let’s dive into some techniques to bring your colored water drawings to life:
1. Layering Colors
- Start with light washes of color, gradually building up the intensity.
- Allow each layer to dry completely before applying the next to prevent colors from muddying.
- Use a light touch and avoid overworking the paper.
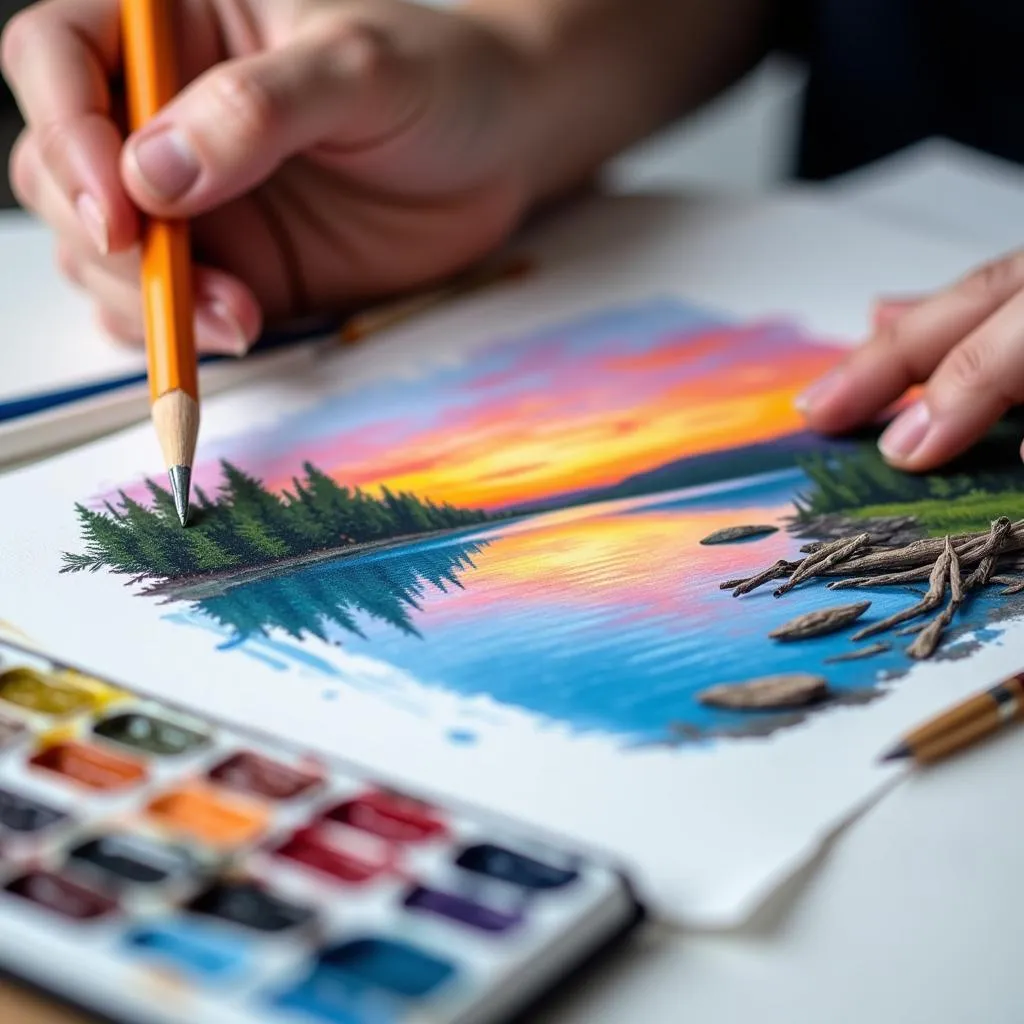
 Watercolor techniques for beginners
2. Blending and Gradients
- To create smooth transitions between colors, wet the paper before applying watercolor pencils or paints.
- Use a clean, damp brush to blend adjacent colors, creating seamless gradients.
- Experiment with different brushstrokes to create various effects like ripples or waves.
3. Creating Reflections
- Observe how objects reflect on the water’s surface. Reflections are often distorted and elongated.
- Use lighter and less saturated colors for reflections than the objects themselves.
- Consider the angle of the light source and how it affects the reflections.
4. Adding Texture and Details
- Use a dry brush technique to create the impression of foam, ripples, or waves.
- Experiment with salt to create unique textures on wet watercolor washes.
- Add details like rocks, plants, or boats to enhance the realism of your water scene.
Tips for Success
- Practice makes perfect: Don’t be afraid to experiment and try different techniques.
- Study references: Look at photographs or observe water in real life to understand its movement and color variations.
- Be patient: Drawing colored water takes time and practice. Don’t get discouraged if your first attempts don’t turn out exactly as planned.
Conclusion
Drawing colored water can be a rewarding experience. By understanding the interplay of light, color, and texture, and by mastering the techniques outlined above, you can create captivating and lifelike depictions of water in all its glory.
Remember, the key is to observe, experiment, and enjoy the process of bringing your artistic vision to life.
FAQs
1. What are the best colors for painting water?
While the specific colors depend on your subject, a good starting palette includes blues (ultramarine, cerulean, cobalt), greens (phthalo green, sap green), yellows (cadmium yellow, yellow ochre), and browns (burnt sienna, raw umber).
2. How do I prevent my colors from becoming muddy?
Clean your brush frequently and use a light touch when layering colors. Allow each layer to dry completely before applying the next to avoid muddying.
3. What is the best way to create the illusion of depth in water?
Use lighter and brighter colors towards the foreground and gradually darken and desaturate colors as they recede into the background. This will create an illusion of depth and distance.
4. How do I make my water look more realistic?
Observing real water is key. Pay attention to how light reflects and refracts, creating highlights and shadows. Also, consider adding small details like ripples, bubbles, and reflections of nearby objects.
5. What should I do if I make a mistake?
Don’t worry, mistakes happen! With watercolor, you can often lift off excess paint with a damp brush or paper towel. You can also incorporate mistakes into your painting as happy accidents, adding to the overall effect.
Need more tips on mastering the art of drawing? Check out our articles on how to draw the northern lights with colored pencils easy, how to draw a sunset with colored pencils, and how to color with pencil.
Need further assistance with your artistic endeavors? Don’t hesitate to contact us. Call us at: 0373298888, Email us at: [email protected], or visit us at 86 Cầu Giấy, Hà Nội. We have a dedicated customer support team available 24/7 to help you unleash your creativity!