Color filling engraved metal is a fantastic way to add depth, vibrancy, and a touch of personal flair to your projects. Whether you’re working on jewelry, signage, or decorative pieces, mastering this technique can elevate your craftsmanship and create stunning visual effects. This guide will explore various methods and materials, providing you with the knowledge and confidence to transform your engraved metal creations.
Choosing the Right Materials for Color Filling
Selecting the right materials is crucial for a successful and long-lasting color fill. The type of metal, the depth of the engraving, and the desired finish all play a role in determining the best approach. Let’s break down the essential components:
Paints and Enamels
For a vibrant and durable finish, consider using enamel paints specifically designed for metal. These paints are available in a wide array of colors and offer excellent adhesion and resistance to chipping and fading. Alternatively, acrylic paints can be a cost-effective option for less demanding applications. When using acrylics, ensure they are formulated for metal and consider applying a sealant for added protection.
Fillers and Resins
Epoxy resins are a popular choice for filling engraved metal, offering a glossy, professional finish. They are also highly durable and resistant to wear and tear. For a more traditional approach, consider using metal fillers specifically designed for jewelry or other intricate metalwork. These fillers often come in a variety of metallic shades and can be polished to a high shine.
Application Tools
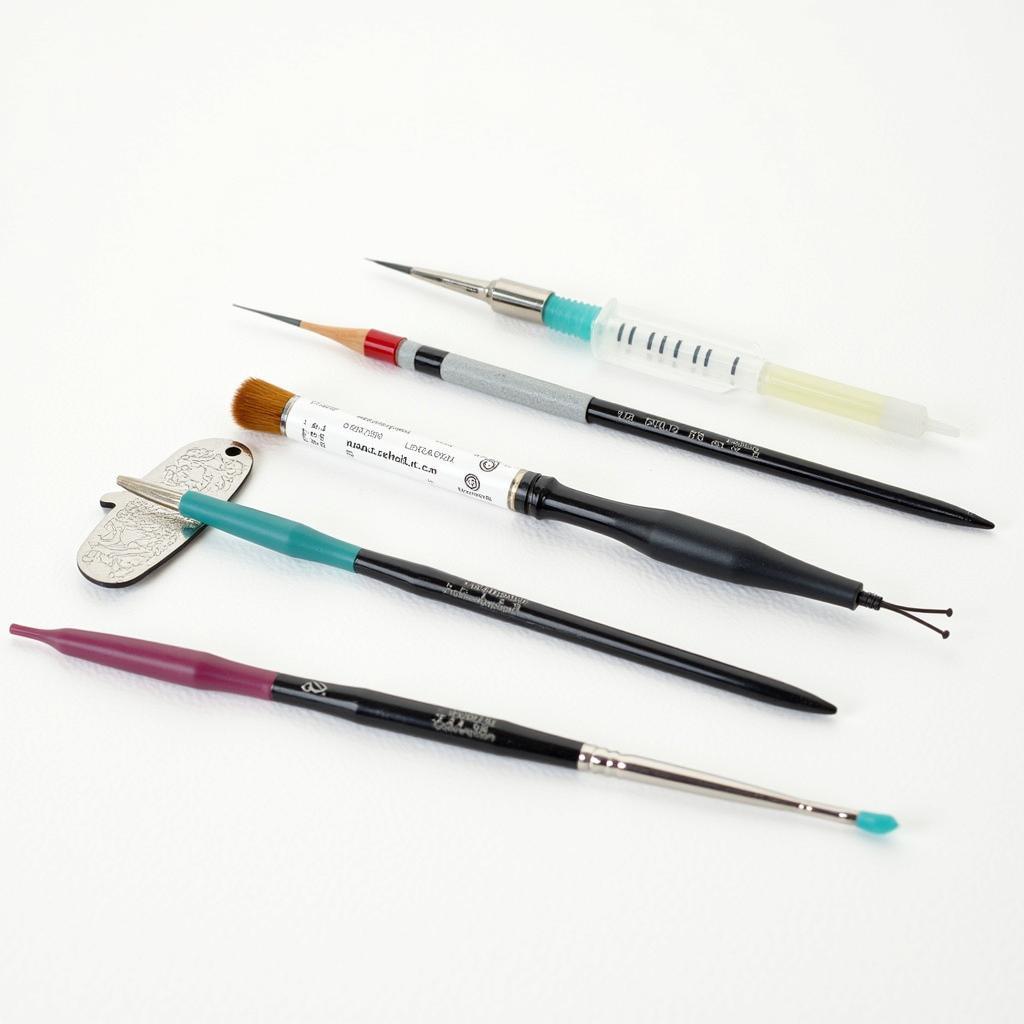
Precision is key when color filling engraved metal. Fine-tipped brushes, toothpicks, or even syringes can be used to carefully apply the chosen medium into the engraved recesses. Having the right tools will ensure clean lines and prevent the color from bleeding outside the engraved area.
 Essential Color Filling Tools for Engraved Metal
Step-by-Step Guide to Color Filling Engraved Metal
Now that we’ve covered the materials, let’s dive into the process. This step-by-step guide will outline the general procedure, which can be adapted based on the specific materials you choose:
-
Prepare the Surface: Thoroughly clean the engraved metal surface with a degreaser or isopropyl alcohol to remove any oils, dirt, or residue that could interfere with adhesion.
-
Apply the Color: Carefully apply your chosen color filling medium into the engraved recesses. Use a fine-tipped brush, toothpick, or syringe to ensure precise application and prevent bleeding.
-
Remove Excess Color: Using a clean cloth or a plastic scraper, carefully remove any excess color from the surface of the metal, leaving only the color within the engraving.
-
Curing/Drying: Allow the color fill to dry or cure completely according to the manufacturer’s instructions. This may involve air drying, baking, or UV curing.
-
Finishing Touches: Once the color fill is fully cured, you can polish the metal surface to remove any remaining residue and achieve the desired finish.
How to Add Color to Engraving: Tips and Tricks
Here are a few additional tips to help you achieve professional-looking results:
- Practice on scrap metal: Before working on your final piece, practice your technique on a scrap piece of similar metal. This will allow you to get a feel for the materials and refine your application process.
- Thinning the color: If your chosen medium is too thick, you can thin it with a suitable thinner or solvent according to the manufacturer’s instructions. This will make it easier to apply and ensure a smooth, even finish.
- Multiple coats: For deeper engravings or more vibrant colors, you may need to apply multiple coats of color fill. Allow each coat to dry or cure completely before applying the next.
For more insights, explore our guide on how to add color to engraving.
Conclusion
Color filling engraved metal is a rewarding technique that can transform ordinary metal pieces into stunning works of art. By following this guide and experimenting with different materials and techniques, you can unlock a world of creative possibilities and add a touch of personalized brilliance to your projects. Remember that practice makes perfect, so don’t be afraid to experiment and explore the endless possibilities of color.
FAQs
- What type of paint is best for color filling engraved metal? Enamel paints specifically designed for metal offer excellent durability and vibrancy.
- Can I use acrylic paint for color filling engraved metal? Yes, but ensure it’s formulated for metal and consider applying a sealant for added protection.
- What tools do I need for color filling engraved metal? Fine-tipped brushes, toothpicks, or syringes are ideal for precise application.
- How do I remove excess color fill? Use a clean cloth or a plastic scraper.
- How long does it take for the color fill to dry? Drying times vary depending on the material used; refer to the manufacturer’s instructions.
Common Scenarios and Questions
-
Scenario: The color fill is bleeding outside the engraved lines.
-
Solution: Ensure the metal surface is clean and free of oils. Use a finer application tool and remove excess color promptly. Thinning the paint might also help.
-
Question: How can I achieve a more polished look after color filling?
-
Answer: After the color fill has cured, gently polish the metal surface with a suitable polishing compound.
Further Exploration
For more detailed information on various color filling techniques, consider exploring articles on specific materials like enamel paints or epoxy resins. You can also find tutorials on achieving specific finishes, such as a high-gloss or antique look.
Need further assistance? Contact us at Phone: 0373298888, Email: [email protected] or visit us at 86 Cầu Giấy, Hanoi. Our customer service team is available 24/7.

