Coloring lineart in Procreate is a fun and rewarding way to bring your digital illustrations to life. Whether you’re a seasoned pro or just starting out, Procreate’s intuitive tools and vast color options make the process enjoyable for everyone. In this guide, we’ll walk you through the essential steps and techniques to master the art of coloring lineart in Procreate, unlocking your creativity and helping you achieve stunning results.
Getting Started: Prepping Your Lineart
Before diving into the world of color, it’s crucial to have your lineart ready. You can either create your own directly in Procreate or import existing drawings. Here’s how to ensure your lineart is prepped for seamless coloring:
- Clean Lines: Ensure your lineart is crisp and clear. Use Procreate’s selection tools to refine any messy areas and erase stray marks for a polished look.
- Separate Layers: If your lineart has multiple elements, consider placing them on separate layers. This allows for greater control when coloring and prevents accidental spills onto other parts of your artwork.
- Adjust Opacity (Optional): Some artists prefer to lower the opacity of their lineart slightly before coloring. This helps the colors stand out and creates a more blended effect. Experiment to see what works best for you.
Mastering the Tools: Brushes and Blending Modes
Procreate offers an array of powerful tools to make coloring lineart a breeze. Familiarizing yourself with these tools will unlock a world of creative possibilities:
- Brushes: Experiment with different brushes to achieve various textures and effects. Procreate’s default brushes offer a great starting point, but don’t hesitate to explore the vast library of free and paid brushes available online.
- Blending Modes: Blending modes can dramatically change how colors interact with each other. Play around with options like Multiply, Overlay, and Color Dodge to create depth, highlights, and unique effects.
 Procreate Brushes and Blending Modes
Step-by-Step: Coloring Your Lineart
Now that your lineart is prepped and you’re familiar with the tools, let’s dive into the step-by-step process of coloring:
- Create a New Layer: Always color on a separate layer below your lineart layer. This ensures your linework stays clean and allows for easy edits without affecting the colors.
- Choose Your Colors: Procreate offers a vast color palette and the ability to create custom palettes. Select colors that complement your artwork and evoke the desired mood.
- Start Coloring: Use the brush of your choice to fill in the areas within your lineart. Procreate’s “ColorDrop” feature makes filling in large areas quick and easy.
- Add Depth and Dimension: Experiment with shading and highlighting to give your artwork dimension. Use lighter and darker shades of your base colors to create shadows and highlights.
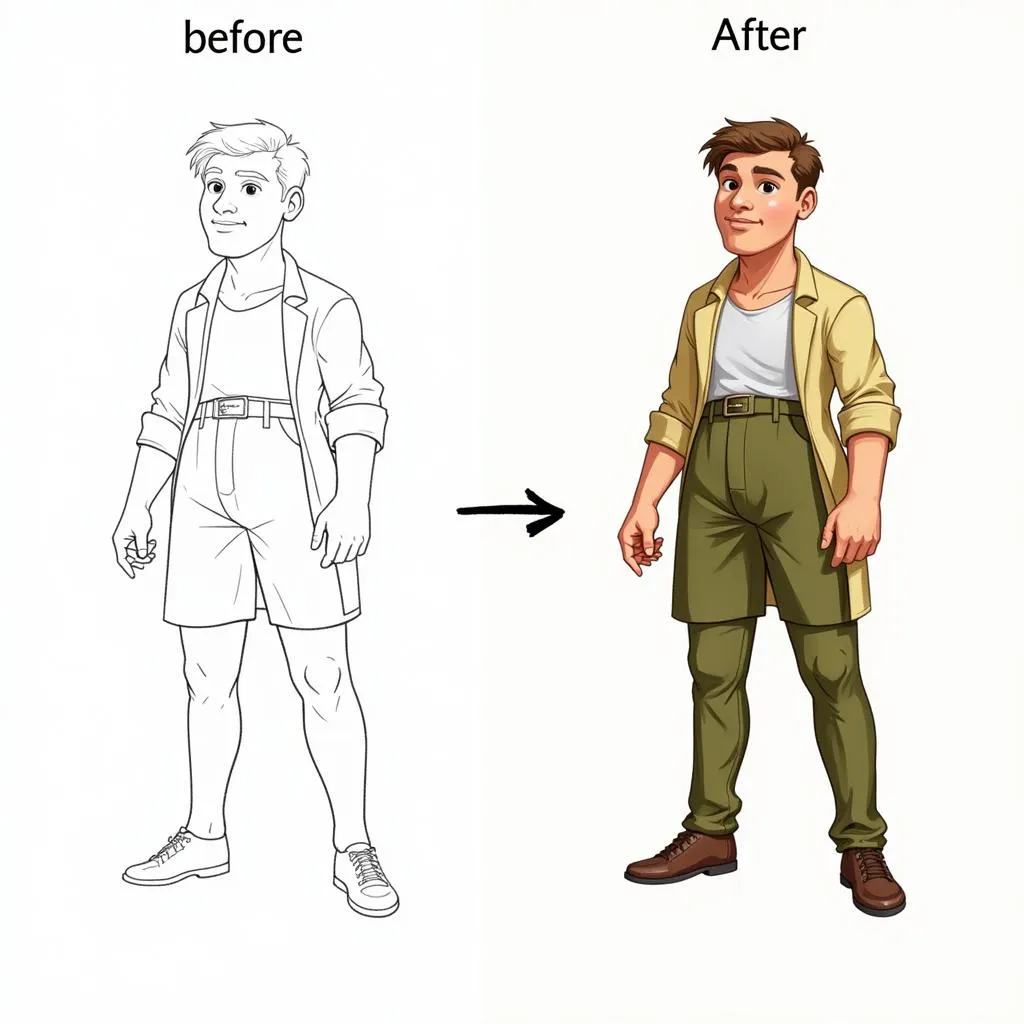 Lineart Coloring Process in Procreate
Advanced Techniques: Enhancing Your Artwork
Once you’ve mastered the basics, take your coloring to the next level with these advanced techniques:
- Gradients: Use Procreate’s gradient tool to create smooth transitions between colors. This is perfect for adding depth to backgrounds or creating a sense of lighting.
- Texturing: Experiment with texture brushes to add interesting details and visual interest to your artwork. You can create everything from subtle fabric textures to rough concrete effects.
- Adding Effects: Explore Procreate’s Adjustments menu to fine-tune your colors, adjust brightness and contrast, or add special effects like blurs and glows.
Tips for Success
- Practice Makes Perfect: The more you practice, the better you’ll become at coloring lineart in Procreate. Don’t be afraid to experiment with different brushes, colors, and techniques.
- Reference Images: Use reference images for inspiration, especially when working with realistic textures or lighting effects.
- Save Regularly: Procreate autosaves your work, but it’s always a good habit to save manually as you go, especially after making significant changes.
- Have Fun! Coloring should be an enjoyable experience. Don’t be afraid to let your creativity flow and experiment.
Conclusion
Mastering the art of how to color lineart in Procreate opens up a world of possibilities for your digital illustrations. With practice, patience, and a touch of creativity, you can transform simple line drawings into vibrant works of art.
Remember, there’s no right or wrong way to color. Embrace the freedom of digital art, experiment with different approaches, and enjoy the journey of bringing your artistic vision to life.
Need help coloring your lineart in Procreate? Contact us! Call us at 0373298888, email us at [email protected], or visit us at 86 Cầu Giấy, Hà Nội. Our customer support team is available 24/7 to assist you.