Paracord bracelets have become increasingly popular due to their versatility, durability, and stylish look. Knowing how to make a parachute cord bracelet with two colors allows you to add a unique touch to your accessory game, showcasing your personality and style. This guide will provide a step-by-step approach to help you create your own two-tone paracord bracelet.
Choosing Your Paracord and Colors
The first step in making a two-color paracord bracelet is choosing your materials. Paracord, also known as parachute cord, is a lightweight nylon rope originally used in parachute suspension lines. Today, it’s widely used for various purposes, including crafting.
When selecting your paracord, consider the following:
- Color: With countless color combinations, choose two colors that complement each other or reflect your personal style. Consider contrasting colors for a bold look or complementary colors for a more subtle design.
- Type: Different types of paracord are available, typically differentiated by their diameter and number of inner strands. For bracelets, 550 paracord is the most popular choice due to its durability and manageable size.
- Length: The length of paracord you need will depend on your wrist size and the desired bracelet size. As a general rule, it’s better to have too much paracord than not enough, so start with at least 6 feet of each color.
Gathering Your Supplies
Once you’ve chosen your paracord, gather the following supplies:
- Scissors: Sharp scissors are crucial for clean and precise cuts.
- Lighter: A lighter is essential for sealing the ends of the paracord to prevent fraying.
- Tape Measure: Accurately measure your wrist and the length of your bracelet.
- Buckle or Closure: Choose a buckle or closure that complements your paracord colors and style.
Measuring and Cutting the Paracord
Before you start braiding, you’ll need to measure and cut your paracord:
- Measure your wrist circumference: Using the tape measure, measure your wrist circumference just above the wrist bone.
- Add length for comfort and the buckle: Add 1 to 2 inches to your wrist measurement to allow for comfort and the buckle.
- Cut the main color paracord: Cut a length of your main color paracord twice the length of your desired bracelet measurement (including the added length for comfort and buckle).
- Cut the accent color paracord: Cut a length of your accent color paracord half the length of your main color paracord.
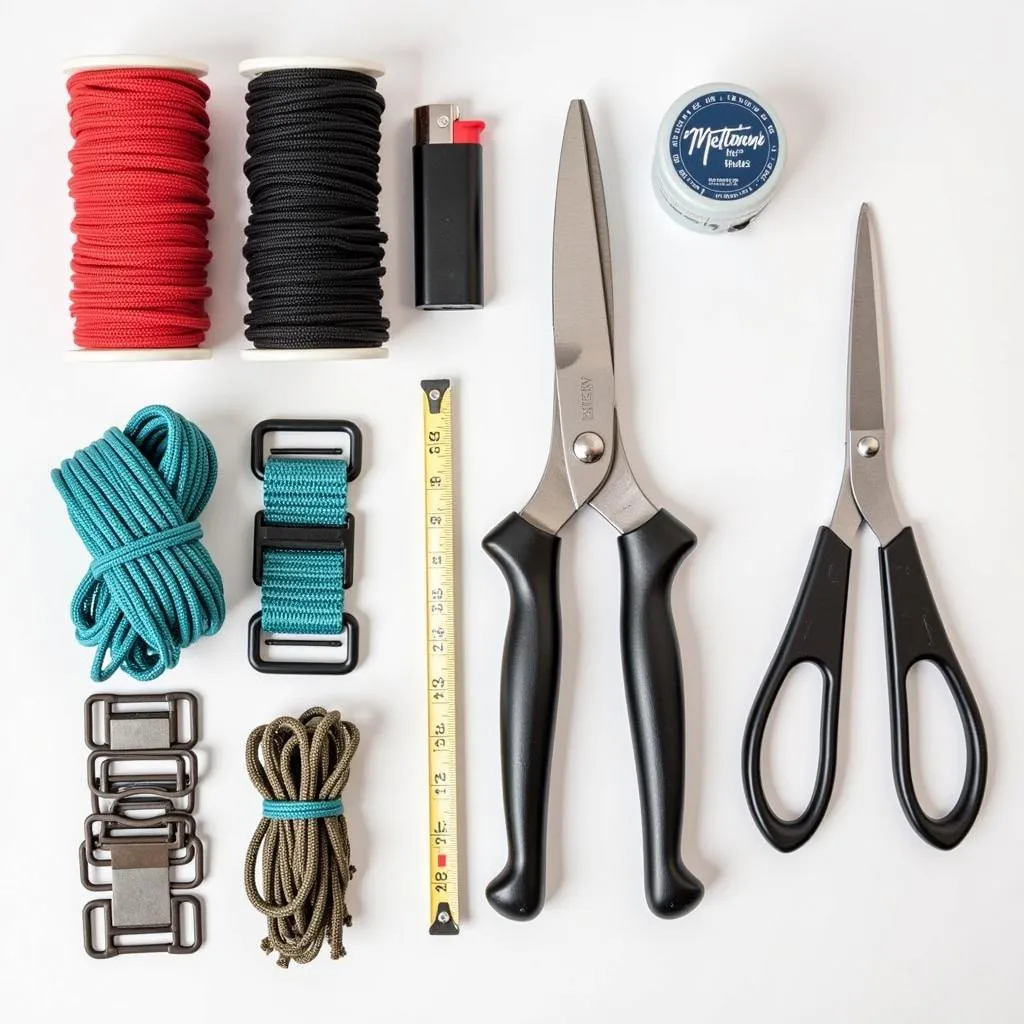 Supplies for making a two-color paracord bracelet
Getting Started with the Braiding
Now that you have your materials prepared, it’s time to start braiding:
- Fold the main color paracord in half: Fold the main color paracord in half, creating a loop at the fold.
- Position the accent color paracord: Place the accent color paracord behind the loop of the main color paracord.
- Create the first knot: Bring the right side of the main color paracord over the accent color paracord and then under the left side of the main color paracord. Pull the knot tight.
- Repeat on the other side: Now, bring the left side of the main color paracord over the accent color paracord and then under the right side of the main color paracord. Pull the knot tight.
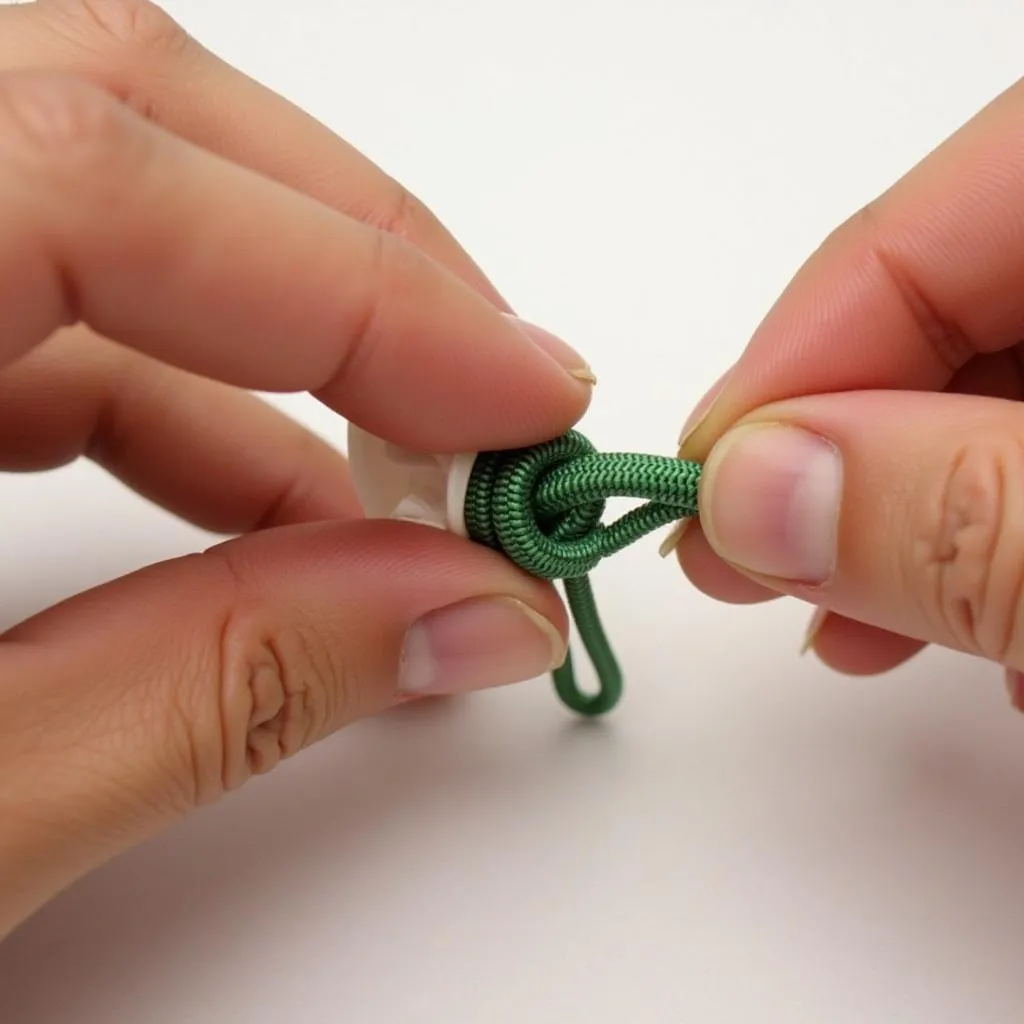 Creating the initial knot for a paracord bracelet
Continuing the Braid
With the first set of knots complete, continue the braid:
- Consistent tension: Maintain consistent tension throughout the braiding process to ensure a neat and even bracelet.
- Mirror the knots: Repeat steps 3 and 4 from the “Getting Started with the Braiding” section, consistently mirroring the knots on each side of the bracelet.
- Adjust as needed: As you braid, gently slide the knots upwards to keep the braid tight and adjust the tension to your liking.
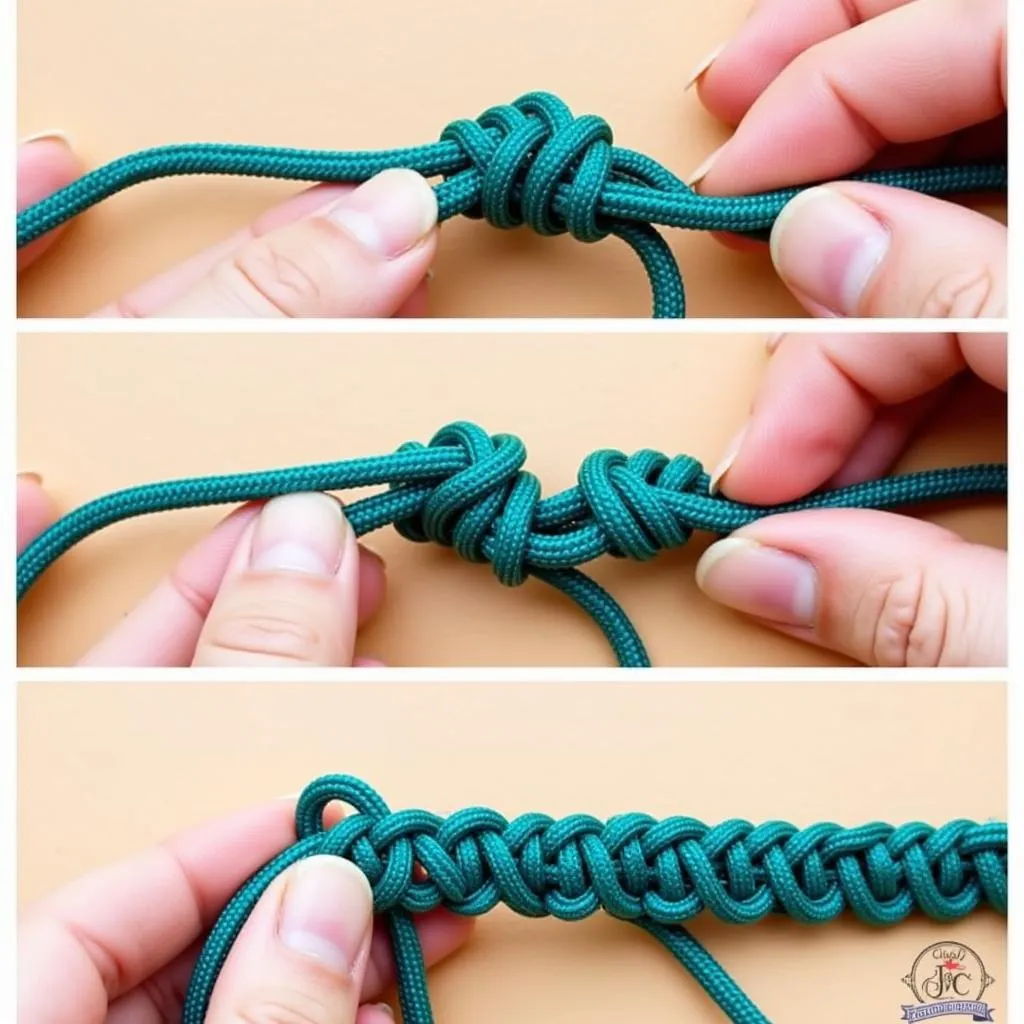 Braiding a two-color paracord bracelet
Finishing the Bracelet
- Measure for the buckle: Once you’ve braided to your desired length (leaving enough room for the buckle), stop braiding and hold the bracelet against your wrist to ensure a comfortable fit.
- Secure the end: Thread the ends of the paracord through the buckle or closure, ensuring a secure fit.
- Seal the ends: Use a lighter to carefully melt and seal the ends of the paracord to prevent fraying.
Tips for Success
- Practice makes perfect: If you’re new to paracord braiding, start with a simple two-color pattern and practice until you’re comfortable with the technique.
- Use a jig (optional): A paracord jig can be a helpful tool for maintaining consistent tension and spacing in your braid.
- Explore different patterns: Once you’ve mastered the basic two-color braid, experiment with different patterns and color combinations.
Conclusion
Creating a two-color paracord bracelet is a rewarding and enjoyable project that allows you to express your creativity and craftsmanship. With a little patience and practice, you can master the art of paracord braiding and create stylish and durable bracelets to wear or gift to friends and family.
FAQs
1. What is the best type of paracord for bracelets?
550 paracord is the most commonly used type for bracelets due to its strength, durability, and ease of handling.
2. How much paracord do I need for a bracelet?
The length of paracord needed varies depending on wrist size and bracelet style. As a general rule, it’s recommended to start with at least 6 feet of each color.
3. Can I wash my paracord bracelet?
Yes, paracord bracelets are washable. Hand wash them with mild soap and water and let them air dry.
Need Help?
Contact us at Phone Number: 0373298888, Email: [email protected] Or visit us at: 86 Cầu Giấy, Hà Nội. We have a 24/7 customer support team.