Achieving realistic skin tones for your fondant creations is an art form in itself. This comprehensive guide delves into the intricacies of making skin color icing, providing you with the knowledge and techniques to create lifelike figures and decorations.
Understanding the Color Wheel
Before diving into mixing skin tones, it’s crucial to grasp the basics of color theory. The color wheel serves as our roadmap, guiding us in creating the perfect shade. Primary colors, red, yellow, and blue, form the foundation. By combining these primaries, we unlock a spectrum of secondary and tertiary colors, each playing a crucial role in crafting realistic skin tones.
Essential Tools and Ingredients
Having the right tools and ingredients is paramount in achieving optimal results:
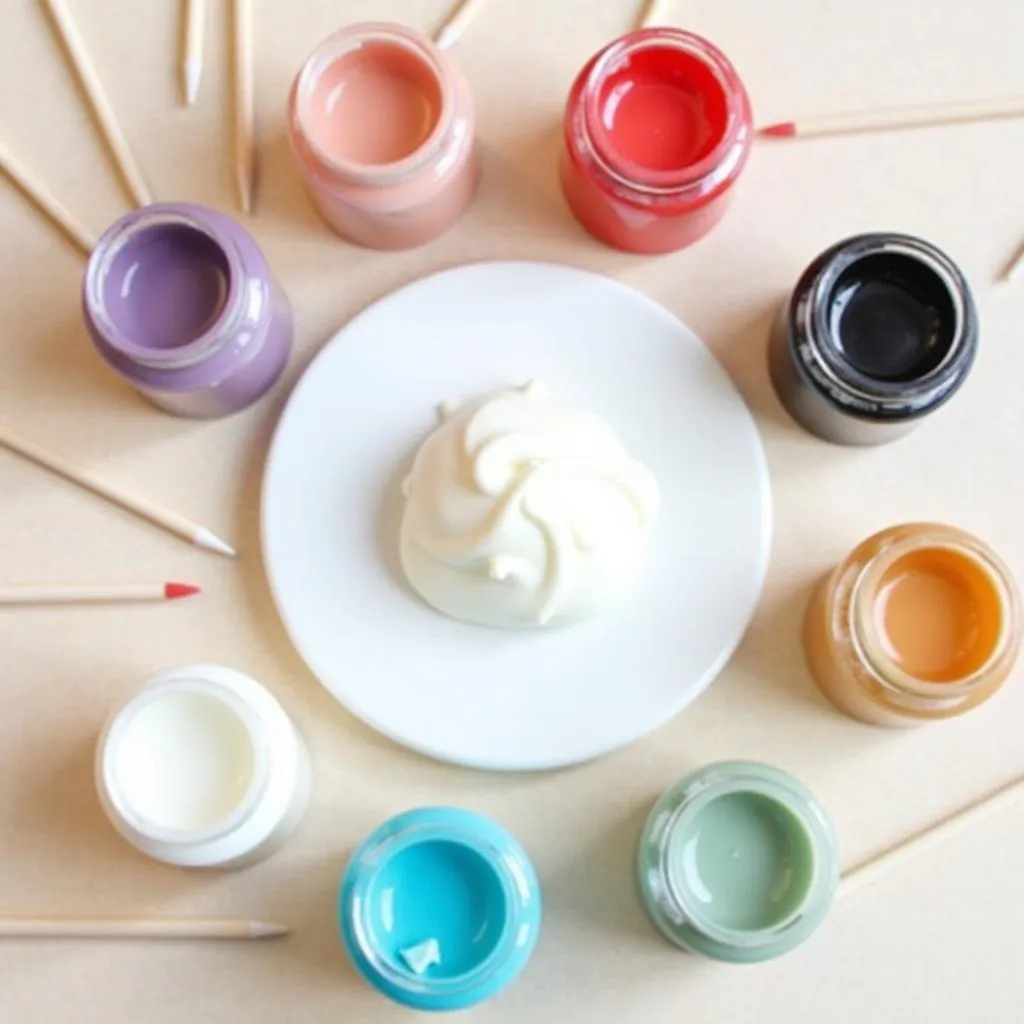
- Gel Food Coloring: Unlike liquid food coloring, gel colors offer concentrated pigmentation without thinning the icing. Invest in a set with a variety of shades, including red, yellow, blue, brown, and ivory.
- White Icing: Begin with a pristine white icing base. This could be buttercream, royal icing, or fondant, depending on your project and preference.
- Mixing Palette: A clean, white surface, like a plate or a piece of parchment paper, will serve as your mixing palette, allowing for accurate color assessment.
- Toothpicks: These handy tools are perfect for adding minuscule amounts of color at a time, ensuring precise control over the shade.
Mastering the Art of Mixing
Creating skin color icing is a gradual process that involves a keen eye and patience:
- Start with White: Begin with a generous portion of your chosen white icing on your mixing palette.
- Add Color Gradually: Using a toothpick, introduce a tiny amount of your chosen base color. Ivory or a very light beige serves as an excellent starting point.
- Incorporate Red and Yellow: To achieve a natural skin tone, add minuscule amounts of red and yellow gel coloring. Remember, a little goes a long way!
- Adjust with Brown: For darker skin tones, carefully incorporate brown gel coloring. Start with a tiny amount and gradually add more until you achieve the desired shade.
- Test and Refine: Regularly test the color by applying a small amount of icing to a piece of white paper. This allows you to accurately assess the shade and make any necessary adjustments.
Tips and Tricks for Realistic Results
- Lighting Matters: The lighting in your workspace can significantly impact how you perceive color. Use natural daylight whenever possible for the most accurate assessment.
- Practice Makes Perfect: Don’t be discouraged if your first few attempts don’t yield the desired results. Like any skill, mastering skin color icing takes practice and experimentation.
- Observe Real Skin Tones: Pay close attention to the subtle variations in human skin tones. Notice how lighting, undertones, and ethnicity influence color. Use these observations to guide your mixing.
 Mixing Skin Color Icing
Troubleshooting Common Issues
- Icing Too Dark: If your icing becomes too dark, gradually add more white icing until you reach the desired shade.
- Icing Too Yellow: To neutralize excessive yellow tones, carefully incorporate a tiny amount of violet or purple gel coloring.
- Icing Too Pink: If the icing appears too pink, add a minuscule amount of green gel coloring to counteract the redness.
Adding Depth and Dimension
Once you’ve achieved your base skin tone, elevate your creations by adding depth and dimension:
- Airbrushing: Using an airbrush allows you to create subtle shadows and highlights, enhancing the realism of your figures.
- Edible Dusts: Edible dusts, available in a myriad of shades, can be applied with a dry brush to add subtle contours and definition.
- Food Markers: Edible food markers offer precision in adding fine details like freckles, beauty marks, and subtle wrinkles.
Conclusion
Mastering the art of making skin color icing opens a world of possibilities in cake decorating. By understanding color theory, utilizing the right tools and techniques, and embracing practice, you can create lifelike figures and decorations that elevate your creations to new heights. Remember, patience and a keen eye are your greatest assets in this endeavor.
FAQ
1. Can I use liquid food coloring instead of gel coloring?
While you can use liquid food coloring, it’s not recommended for skin tones. Liquid coloring can thin the icing, making it difficult to achieve the desired consistency and vibrancy.
2. How do I store leftover skin color icing?
Store any leftover icing in an airtight container at room temperature, away from direct sunlight. Properly stored icing can last for several days.
3. What’s the best way to color large batches of icing?
If you’re working with a large batch of icing, divide it into smaller portions before adding color. This allows for easier mixing and ensures color consistency.
4. Can I use this guide for airbrushing skin tones?
Absolutely! The principles of color mixing apply to airbrushing as well. Use the same color combinations and adjust the air pressure and paint flow for desired results.
5. Where can I find more inspiration for decorating with skin color icing?
Online platforms like Pinterest, Instagram, and YouTube offer a wealth of inspiration and tutorials from experienced cake decorators.
Still have questions?
For personalized guidance and assistance with your cake decorating endeavors, don’t hesitate to reach out to our team of experts. Contact us at 0373298888 or email us at [email protected]. We’re always happy to help you create edible masterpieces! You can also visit our store at 86 Cầu Giấy, Hà Nội, for a wide selection of cake decorating supplies and expert advice.