Mixing the perfect skin tone for your next portrait or figurative painting can seem daunting. With countless shades and undertones, achieving a natural-looking complexion requires a bit of color theory and practice. But fear not, aspiring artist! This comprehensive guide will delve into the art of mixing skin color acrylic paint, equipping you with the knowledge and techniques to confidently create lifelike skin tones.
Understanding Skin Tones
Before diving into the mixing process, it’s crucial to understand the complexities of skin color. Skin tones are not simply variations of brown; they are influenced by factors such as:
- Melanin: This pigment determines the darkness or lightness of the skin, ranging from deep brown to pale ivory.
- Hemoglobin: The red pigment in blood contributes to the pink and reddish hues in skin.
- Carotene: This yellow pigment, found in carrots and other orange fruits and vegetables, can also affect skin color.
These pigments combine to create a wide spectrum of skin tones, each with its unique undertones.
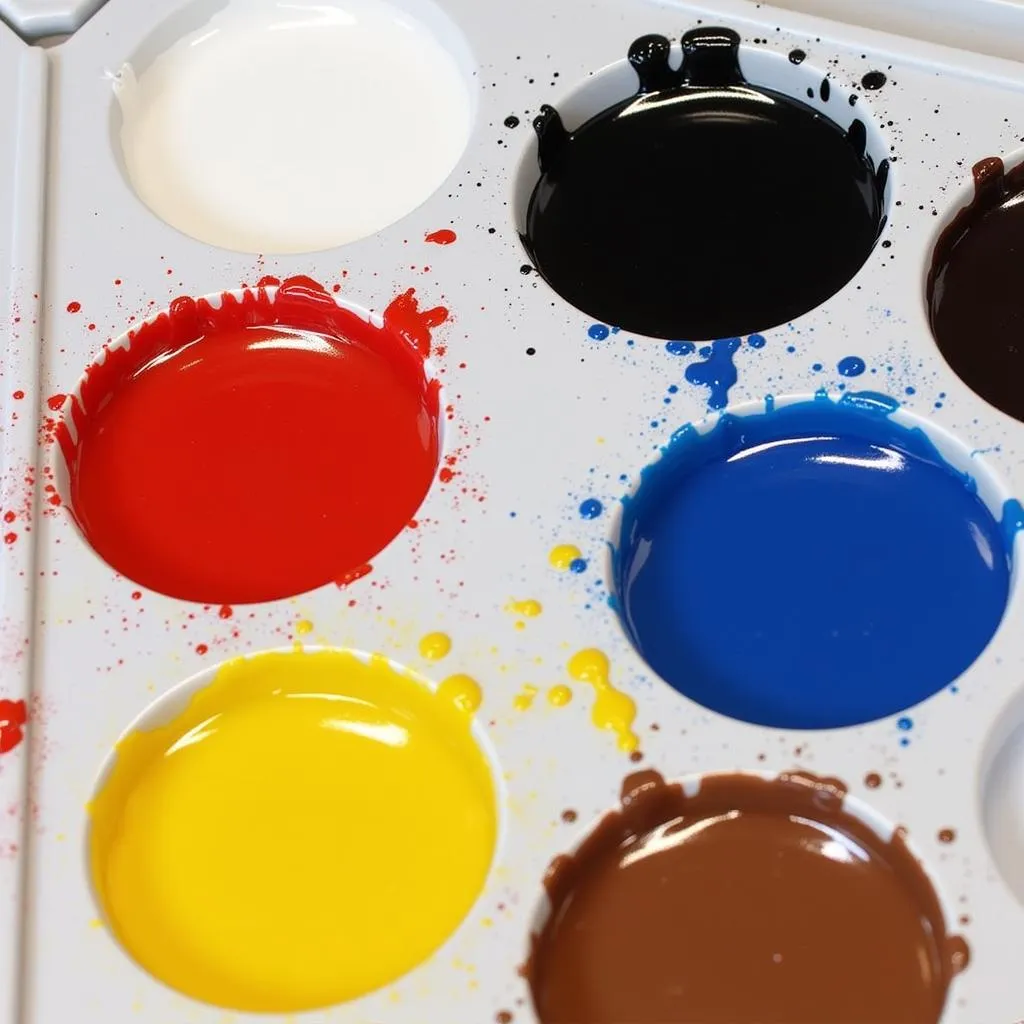
Essential Acrylic Paints for Skin Tones
To begin mixing skin colors, you’ll need a basic palette of acrylic paints:
- White: Titanium White is a popular choice for its opacity and brightening qualities.
- Black: Mars Black offers a rich, deep black for darkening mixtures.
- Red: Cadmium Red Light or Pyrrole Red provide warm, vibrant reds for pink undertones.
- Yellow: Cadmium Yellow Medium or Hansa Yellow are excellent choices for yellow undertones.
- Blue: Ultramarine Blue or Phthalo Blue can be used to neutralize or create cool undertones.
- Brown: Burnt Sienna or Raw Umber can serve as base colors for darker skin tones.
 Acrylic paints for skin tones
Basic Skin Tone Mixing Techniques
1. Start with a Brown Base
Instead of directly mixing all the primary colors, begin with a brown base. Burnt Sienna is a versatile option for lighter skin tones, while Burnt Umber works well for darker complexions.
2. Gradually Add Other Colors
To adjust the hue and value of your brown base, gradually add small amounts of other colors:
- Red: For pinker or warmer undertones.
- Yellow: For yellower or olive undertones.
- Blue: To neutralize warm tones or create cool undertones.
- White: To lighten the mixture.
- Black: To darken the mixture.
3. Test Your Colors
Before applying the paint to your canvas, test the color on a scrap piece of paper or canvas board. Allow it to dry completely, as acrylic paints tend to darken slightly as they dry.
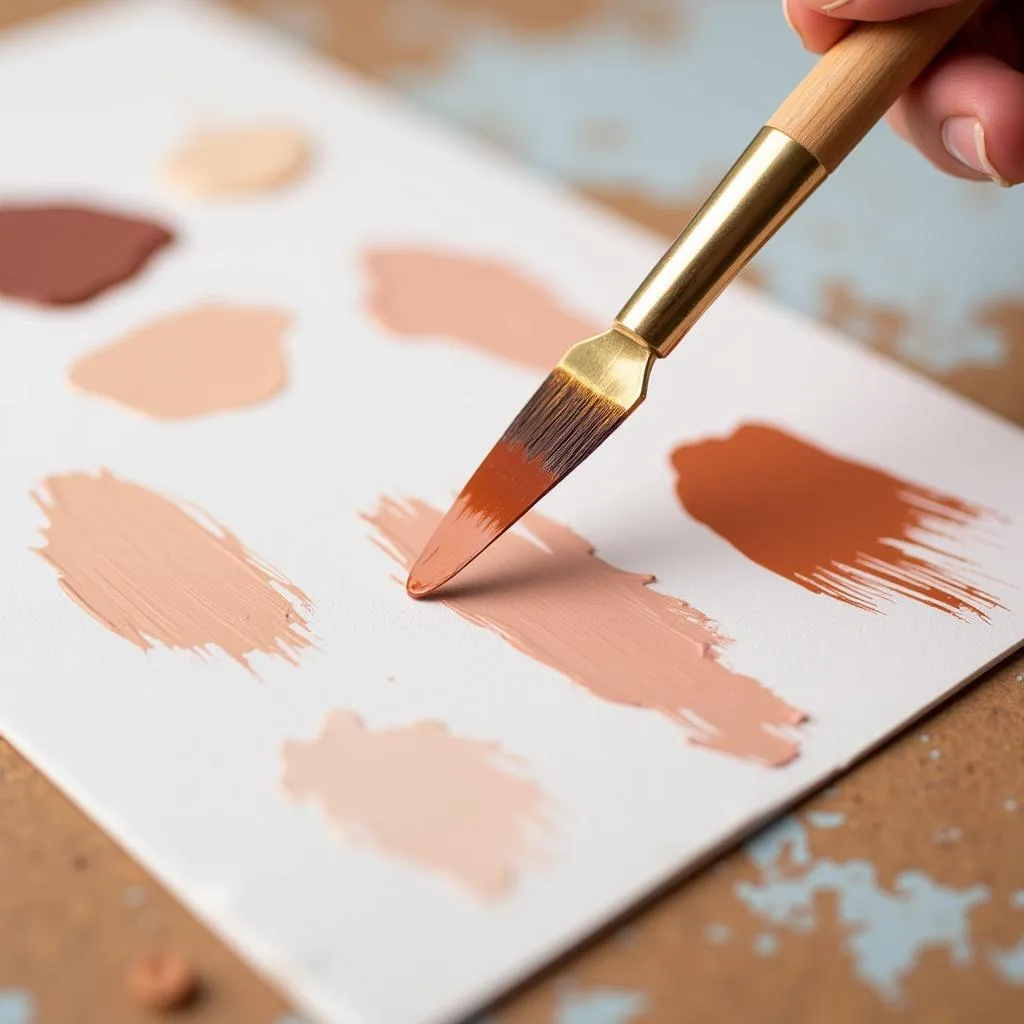 Testing skin tone acrylic paint on a palette
Advanced Tips for Realistic Skin Tones
1. Observe Real Skin
Pay close attention to the subtle color variations in real skin. Notice how light affects different areas of the face and body, creating highlights and shadows.
2. Layer Your Colors
Instead of mixing one homogenous skin tone, create depth and realism by layering different shades. Use lighter tones for highlights and darker tones for shadows.
3. Experiment with Undertones
Experiment with different color combinations to create a range of undertones. For example, adding a touch of green or purple can create more complex and natural-looking skin.
“When mixing skin tones, it’s important to remember that less is more. Start with small amounts of color and gradually build up the desired shade.” – Jane Miller, renowned portrait artist
Common Skin Tone Mixing Challenges and Solutions
1. Muddy Colors
Problem: Overmixing or using too many colors can result in dull, muddy skin tones.
Solution: Use a limited palette of essential colors and mix them gradually.
2. Unnatural Hues
Problem: Using too much of one color can create unnatural-looking skin, such as overly pink or orange tones.
Solution: Balance the colors carefully and observe real skin tones for reference.
3. Lack of Depth
Problem: Using a single skin tone throughout the painting can make it look flat and unrealistic.
Solution: Create dimension by layering different shades to represent highlights, midtones, and shadows.
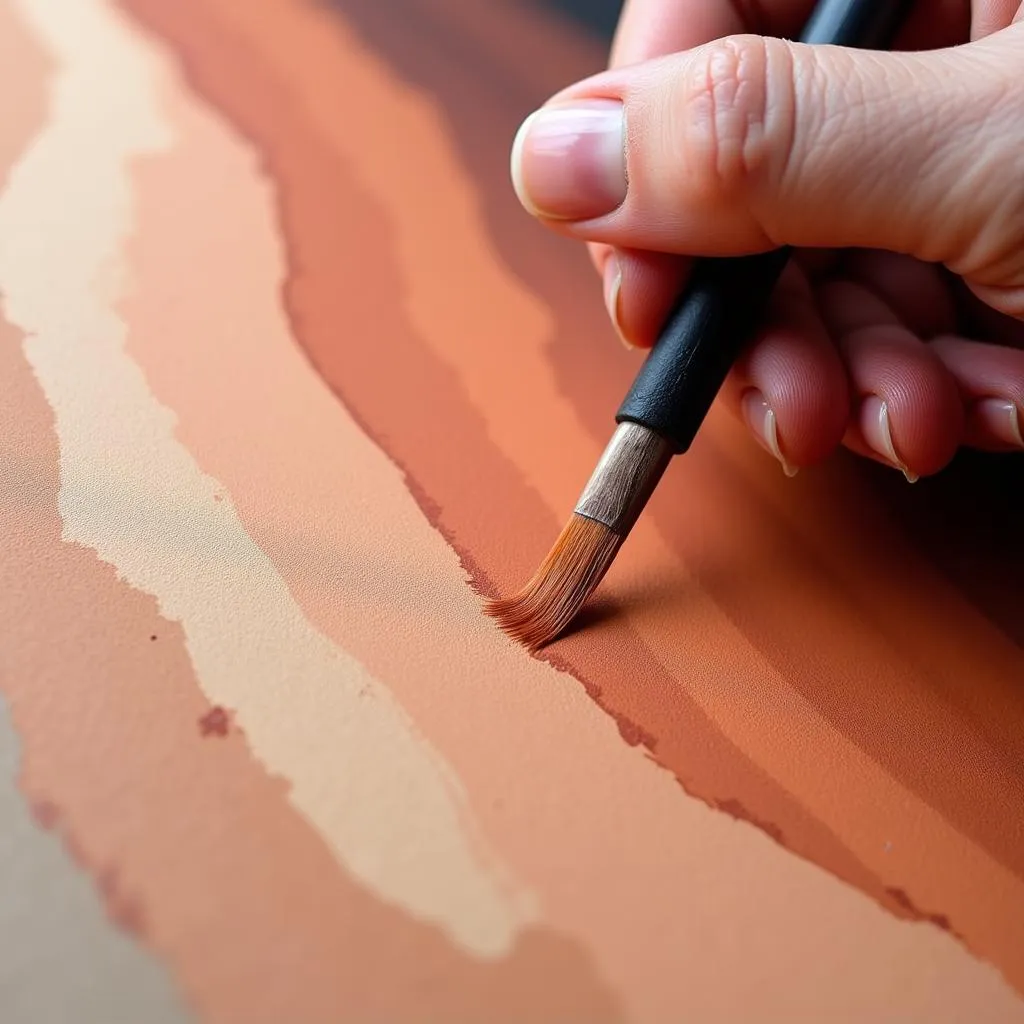 Layering acrylic paint for skin tones
Conclusion
Mastering the art of mixing skin color acrylic paint takes practice and patience. By understanding color theory, using the right techniques, and observing real-life references, you can create stunning and lifelike portraits that capture the beauty of human diversity. So, grab your brushes, experiment with colors, and enjoy the journey of bringing your artistic visions to life.
Remember, there’s no one-size-fits-all approach to mixing skin tones. Embrace the process of experimentation and discovery to develop your unique style and techniques. And most importantly, have fun!
FAQs
1. Can I use pre-mixed skin tone acrylic paints?
While pre-mixed options are available, mixing your own skin tones offers greater control and allows you to achieve more nuanced and personalized results.
2. How do I adjust the opacity of my skin tone mixtures?
To make your skin tones more transparent, add a small amount of glazing medium or water. For increased opacity, use less medium or add more paint.
3. What are some common mistakes to avoid when mixing skin tones?
Using too much white, black, or a single color can lead to unnatural-looking skin. Avoid overmixing, as it can create muddy colors.
4. How can I improve my skills in mixing realistic skin tones?
Practice regularly, observe real skin tones, and experiment with different color combinations. Don’t be afraid to make mistakes; they are valuable learning opportunities.
5. Where can I find more resources and inspiration for painting realistic skin tones?
Online tutorials, art books, and workshops can provide further guidance and inspiration. Seek feedback from fellow artists and continue to challenge yourself creatively.
For more insights on various topics, you can explore these related articles:
Feel free to reach out to our team of experts at Color Box Ha Noi for personalized advice and guidance on your next painting project. Contact us at 0373298888 or [email protected]. We are located at 86 Cầu Giấy, Hà Nội, and offer 24/7 customer support. Let us help you bring your artistic vision to life!